WordPress WooCommerce
Installation Instructions for the ProcardPay Payment Module for WordPress WooCommerce
This guide will help you quickly configure the ProcardPay payment gateway for your WooCommerce-based online store.
System Requirements and Preparation
Before starting the installation, please ensure that your server environment meets the minimum technical requirements:
| Component / Package | Minimum Version | Recommended / Tested |
|---|---|---|
| WordPress | 6.9 | 7.0 |
| WooCommerce | 10.0 | 10.7.0 |
| PHP | 8.2 | 8.2 or higher |
Module Installation
Download the plugin archive.
Extract it to your WordPress site's plugin directory. By default, the path is as follows:
{your_site}/wp-content/plugins/procardpay-for-woocommerce
├── assets
├── includes
├── lang
├── procardpay-for-woocommerce.php
├── README.md
├── README.txt
└── uninstall.phpNavigate to the site's administration panel at
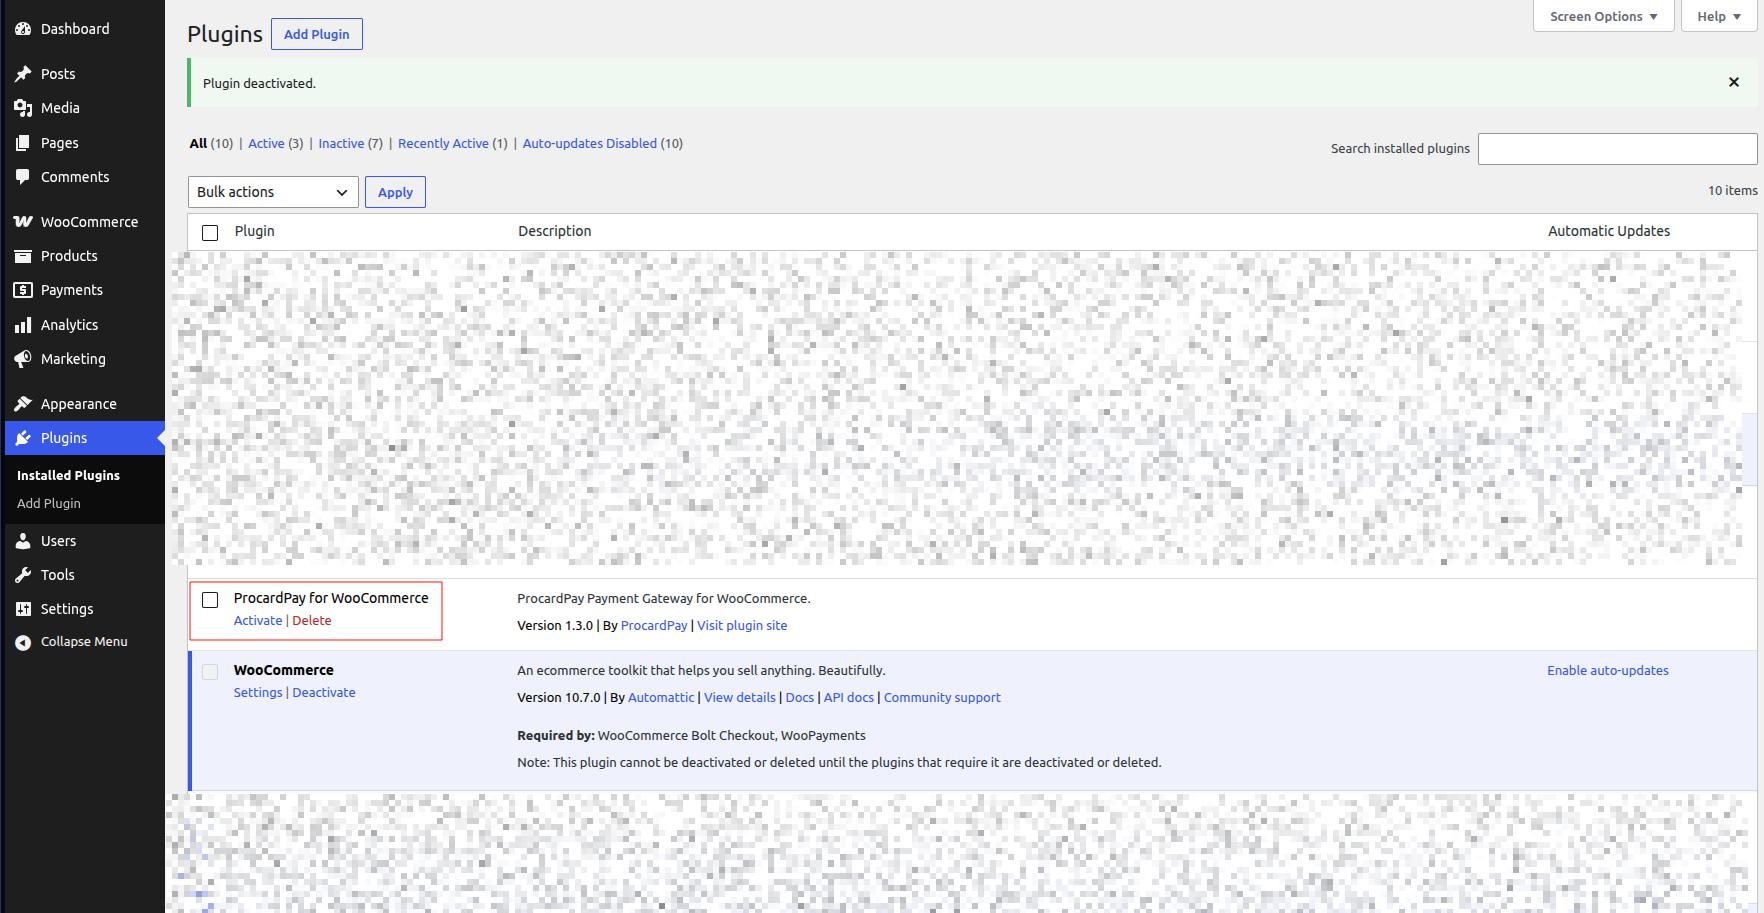
{your_site}/wp-admin/.In the left menu, select Plugins->Installed Plugins.
Find the ProcardPay for WooCommerce plugin in the list and click Activate.
Payment Gateway Configuration
After successful plugin activation, you must enter the technical details to establish a connection with the payment system.
Navigate to the plugin settings. This can be done in two ways:
- Click the Settings button directly in the plugins list.
- Or navigate via: WooCommerce->Settings->Payments tab.

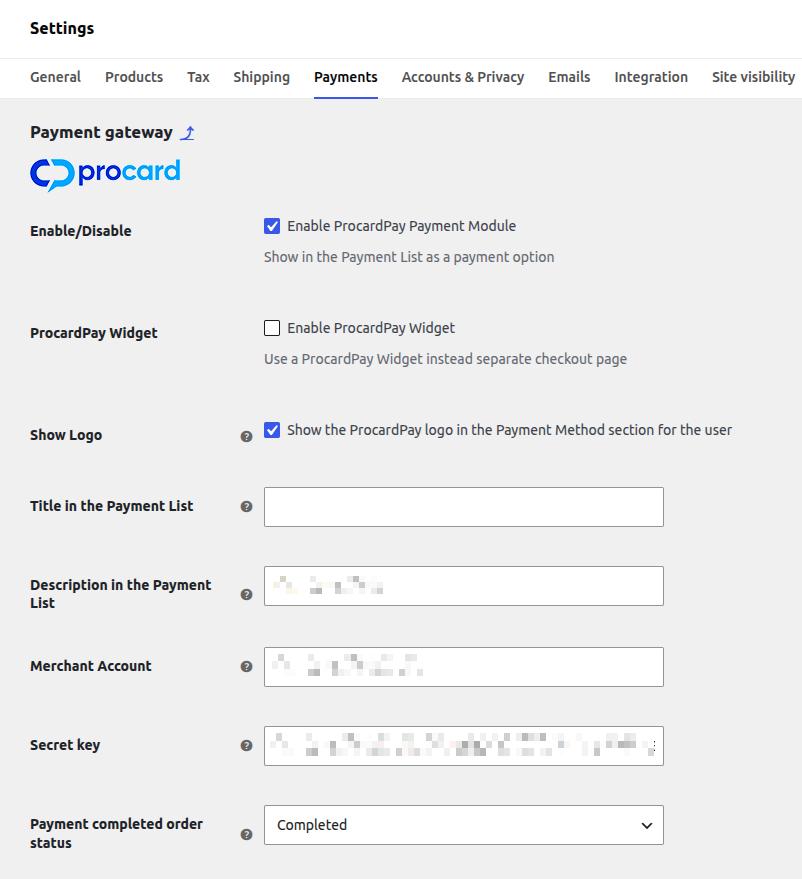
On the configuration page, fill in the following fields (the credentials are provided by the payment system):
Enable/Disable: Check the Enable ProcardPay Payment Module box to activate the visibility of this method during checkout.
ProcardPay Widget: Activate if necessary (see details below).
Show Logo: Enable the display of the official payment system logo on the checkout page.
Title in the Payment List: Specify the name of the method as it will appear to the customer (e.g.,
ProcardPay — Card Payment Visa / Mastercard).Merchant Account: Your unique merchant identifier in the ProcardPay system.
Secret key: The secret key used for encrypting and verifying transactions.
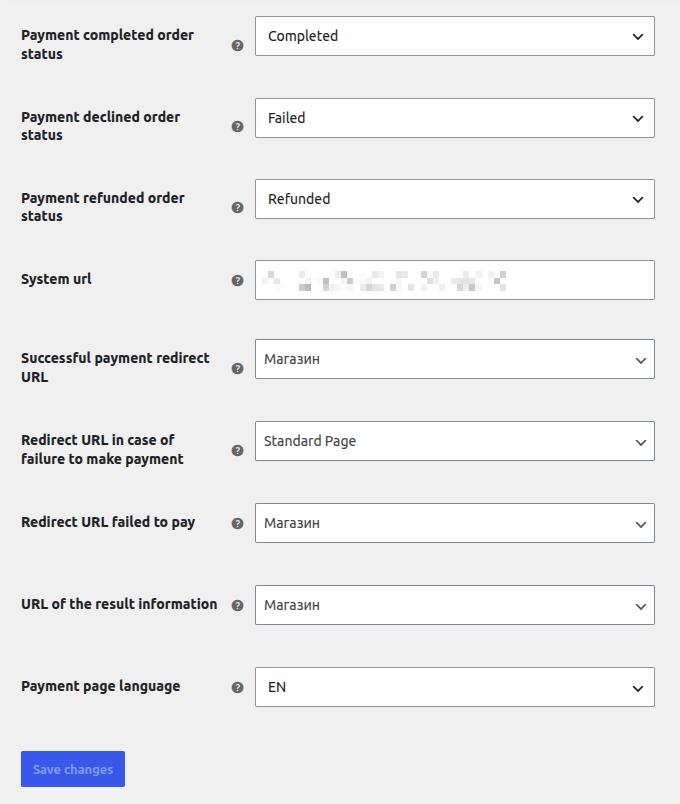
Payment completed order status: Set the order status after a successful payment (recommended:
CompletedorProcessing).System URL: The technical URL of the processing center (set automatically by default).
Payment page language: Select the payment interface language (
EN,UA, etc.).
After filling in all the fields, make sure to click the "Save changes" button at the bottom of the page.
Customer Experience and Payment Modes
The plugin supports two customer interaction scenarios during checkout: In both cases, the customer will see ProcardPay among the available payment options on the website.
Scenario A: Redirect (ProcardPay Widget option is disabled) After selecting the payment method and clicking the Place Order button, the customer is redirected to a secure external ProcardPay payment page, where they can pay via Google Pay or by entering card details.
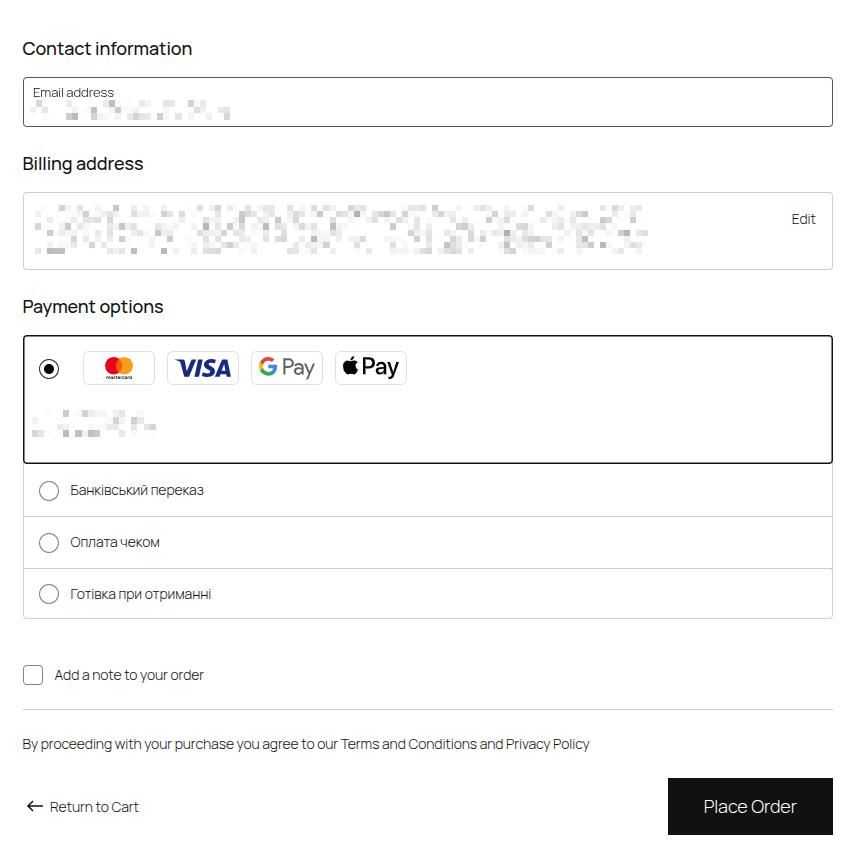
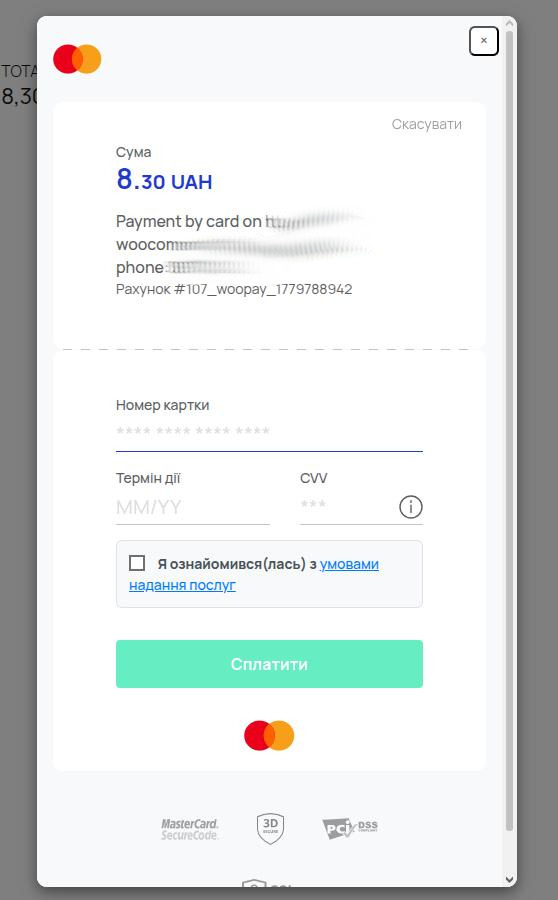
Scenario B: Payment Widget (ProcardPay Widget option is enabled) If you want the payment to take place without redirecting to third-party resources, check the Enable ProcardPay Widget box. In this case, the payment window will open as a modal widget directly on top of your website, keeping the customer focused on your store.
Testing and Verification
After saving the final settings, add any item to the cart and go through the complete checkout process to ensure that:
- Payment system logos are displayed correctly.
- The currency and final total are passed to the gateway without errors.
- Upon successful opening of the checkout form, the user can interact with the card interface.
The module is fully ready for operation!